Assumption: User has EM12cR2 with FMW 12.1.0.3 plugin
A WebLogic Domain Provisioning Profile consists of the Middleware Home, binaries and the domain configuration. One can create a WLS domain provisioning profile, save it in the Software Library, and then use the saved profile as the source for creating new WebLogic domains. This will ensure that future WebLogic installations follow a standard, consistent configuration.
Lets see an example how to create WLS domain provisioning profile.
Assumption:
1. Both source as well destination Host and source WLS domain are monitored target on EMCC.
2. You have the host credentials for both source machine as well as destination host.
3. Source Weblogic Domain should be JRF enabled.
Steps to create WLS domain provisioning profile:
1. Select Enterprise menu->Provisioning and Patching->Software Library.
2. From the Actions menu->click Create Folder to create a folder in which the profile you are creating is to be stored as shown below:


4. A Create Component window appears. From the Select Subtype drop-down list, select the "WebLogic Domain Provisioning Profile" component and click Continue.
5. In the Create WebLogic Domain Provisioning Profile wizard: Describe page, provide details as given below:

6. Click Next. The Create WebLogic Domain Provisioning Profile: Configure page appears. Do ensure that checkbox for 'Include the binaries from Middleware Home in the profile to be created.' is selected. Now using search icon, select the source Weblogic Domain, from which you would like to create the gold image.
Provide the host credentials in the lower panel as shown here:

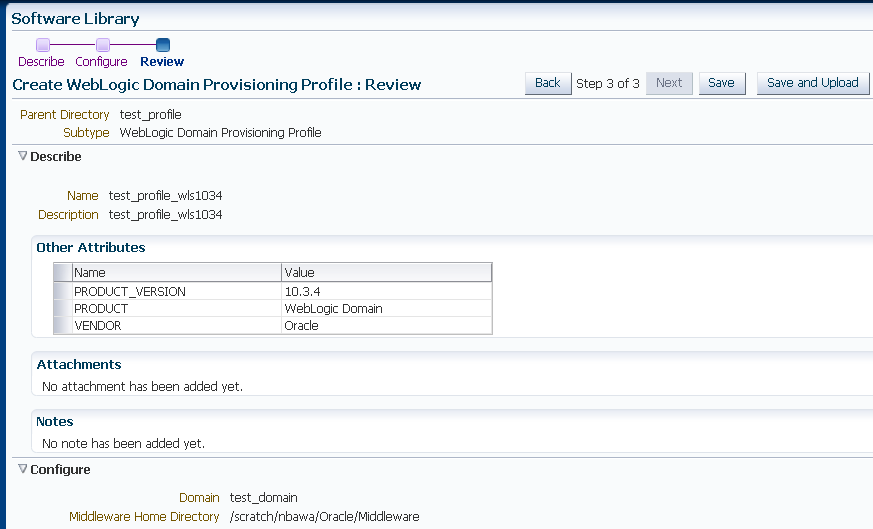
7. Click Next. In the Review page, review the profile information and click Save and Upload.
8. The <Job Name> is displayed at the top of the page. Navigate to the Job Activity page and check the job status.
Once it has been completed, navigate to the Software Library page and confirm if all the components of the profile (WebLogic Domain, MWHome, and Profile) have a Ready Status. You can also verify if the profile has been successfully created by navigating to the Middleware Provisioning page. From the Enterprise menu, select Provisioning and Patching, then select Middleware Provisioning and check if the profile is displayed there. You can now use this profile as the source for future WebLogic Domain installations.
Steps to clone a WLS domain from a WLS domain provisioning profile:
1. Select Enterprise menu->Provisioning and Patching-> Middleware Provisioning.
2. Select profile that was created in earlier steps from the Profiles section->click Provision. ( or select the Middleware Provisioning deployment procedure and click Launch)
3. In the Source page of Provisioning wizard, the selected component and its location is displayed. Click Next.

4. In the Middleware Provisioning: Destinations page, specify the destination hosts on which the WebLogic Domain is to be cloned. Also provide host credentials. For details look at given image:

In the lower panel "Destination Locations" section, one can specify the location of the Middleware Home on the Host machine. The Create a New Middleware Home option is selected by default.
In the Middleware Home Directory field, one enter the full path to the directory in which the Middleware Home is to be created.
In the JDK Home Location field, enter the absolute path to the JDK directory to be used on the destination Host. This field can be edited only if the JDK Home in the source domain is in an external location. If the JDK Home in the source domain is internal and installed in the Middleware Home, this field cannot be edited.
In the Working Directory field, specify the directory on the destination Host on which the cloning related files are temporarily stored.
5. Click Next. Now the Middleware Provisioning: Domain Configuration page appears. This page contains a set of links to several pages where one can enter the properties that are most likely to be reconfigured like domain name, listen addresses for the administration server and managed servers, Node Manager/Machine configuration and JDBC data sources. By default, the source domain configuration settings are used as default values for the destination domain.

In the Server Startup Mode, select JRF startup clssses.
For more details on configuration, go to step 15-23 on http://docs.oracle.com/cd/E24628_01/em.121/e27046/prov_fmw.htm#CHDIJCGE
6. In the Schedule page, select default values. Click Next.

7. On the Review page, review the details. click Submit.

8. In the Procedure Activity page, view the status of the execution of the job and steps in the deployment procedure. Click the Status link for each step to view the details of the execution of each step. One can click Debug to set the logging level to Debug and click Stop to stop the procedure execution.

9. Once the procedure is successful, goto Targets->Middleware and see the newly created wls domain target.


